
Introduction
Large presentations are a pain: they bounce off e-mail size limits, take ages to upload and sync, and make PowerPoint sluggish. Usually only a handful of things are to blame - an oversized photo, a forgotten video, or a whole extra slide master that came along with a copied slide. The hard part is finding them.
The presentaid File Size Inspector shows you exactly where the megabytes in your presentation are and how to get rid of them:
- How big every slide is, sorted from heaviest to lightest.
- How much your slide masters and layouts weigh - including masters that no slide uses.
- Concrete recommendations, such as compressing the picture on slide 5 - each with the space you can save and, where possible, a button that does it for you.
- A built-in Compress Pictures tool that saves a smaller copy of your presentation.

Opening the File Size Inspector
- Open the presentation you want to check.
- In the presentaid ribbon, go to the Proofing group and click File Size.
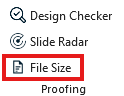
Proofing group with the File Size button - Alternatively, click the File Size Inspector icon in the Proofing section of the presentaid Productivity Pane.
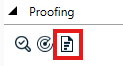
presentaid Productivity Pane Proofing
The analysis takes a few seconds, then the File Size Inspector window opens. It stays open while you work, so you can jump to slides, fix things and check the result.
The Overview
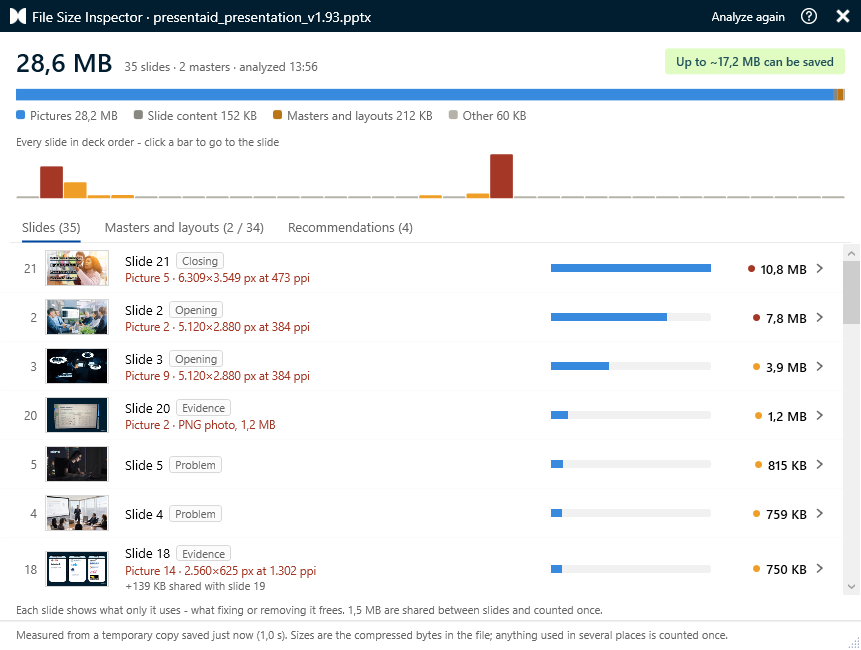
The top of the window answers "how big, and why?":
- Total size - the size of your presentation, the number of slides and masters, and when it was analyzed.
- Savings - the green "Up to ~… can be saved" badge adds up what all recommendations can save.
- Size bar - what the file consists of: pictures, video and audio, embedded files and chart data, slide content, masters and layouts, fonts and other. Hover over a segment to see the exact numbers.
- Slide strip - every slide in deck order as a small bar. Heavy slides stand out in orange, very heavy ones in red. Click a bar to go to that slide.
Below the overview, the window has three tabs: Slides, Masters and layouts and Recommendations.
Slides Tab
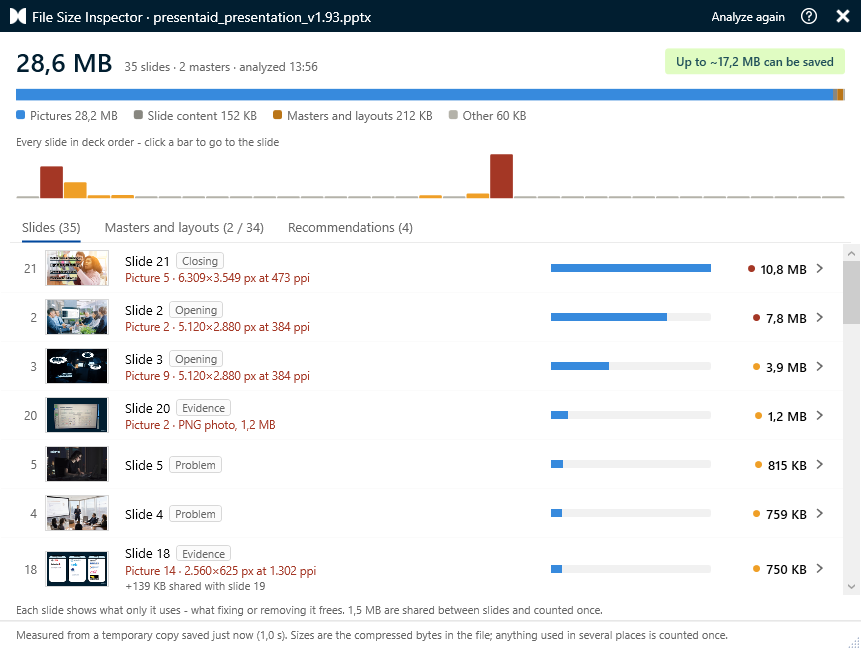
The Slides tab lists every slide, heaviest first. For each slide you see its thumbnail, its number and section, its size and - for heavy slides - the main reason in red, for example a picture with far more pixels than the slide needs.
- Click a slide to go to it in PowerPoint.
- Click the arrow on the right to see what's stored on that slide: every picture, video, chart or embedded file with its size. Click Select next to an item to select it on the slide.
Hidden slides are marked with a Hidden label - they don't appear in your slide show, but they still count toward the file size.
Masters and Layouts Tab
Slide masters and layouts are easy to forget because you rarely see them - yet a background picture on a layout, or a whole extra master that arrived with a copied slide, can add megabytes.
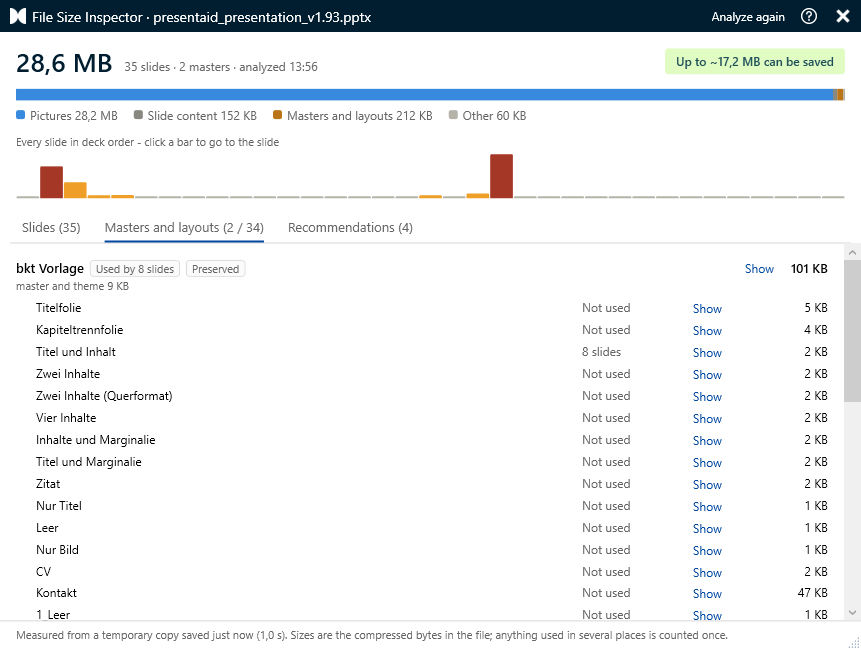
Every slide master shows its size and a few labels:
- Used by … slides - how many slides use this master.
- Unused - no slide uses this master, so it is a good candidate for deleting.
- Preserved - PowerPoint keeps this master even when no slide uses it.
Below each master, its layouts show how many slides use them (or Not used) and their size. Unused layouts that carry real weight - usually because of a background picture - are flagged with an orange Unused label.
Click Show next to a master or layout to open it in PowerPoint's Slide Master view. To get back, simply click a slide in the Slides tab, or close the Slide Master view as usual.
Recommendations Tab
The Recommendations tab tells you what to do, starting with what saves the most. Each recommendation explains the issue, shows how much you can save, and offers a button to act on it - for example Compress pictures…, Delete masters…, Select pictures or Go to slides. Slide numbers in a recommendation are clickable, and How to do it shows step-by-step instructions for anything you do yourself in PowerPoint.
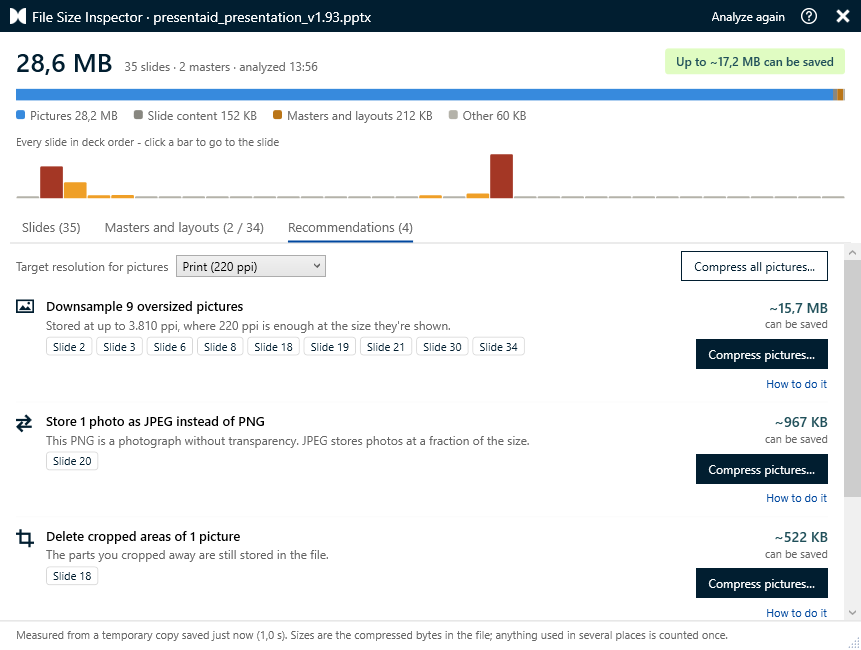
The most common recommendations are:
| Recommendation | What it means |
|---|---|
| Downsample oversized pictures | Pictures have many more pixels than they need at the size they are shown on the slide. |
| Delete cropped areas of pictures | The parts you cropped away are still stored in the file. |
| Store photos as JPEG instead of PNG | A photo saved as PNG is often several times larger than the same photo as JPEG. |
| Remove pictures nobody sees | Pictures that are hidden, off the slide or completely covered still take up space. |
| Compress large videos or audio | Media files are often the biggest part of a presentation. |
| Trim the data behind charts | Every chart carries an Excel workbook - sometimes a much bigger one than the chart needs. |
| Review large embedded objects | Embedded files store a full copy of the original document inside your presentation. |
| Delete unused masters or heavy layouts | Masters and layouts that no slide uses still add to the file size. |
| Move slides off a rarely used master | Only a few slides use a second master. Switching them to your main master makes the second one unused, so it can be deleted. |
| Hidden slides | Hidden slides still count toward the file size - consider keeping backup slides in a separate file. |
| Embedded fonts and the old .ppt format | Both add size that is easy to avoid. |
Use Target resolution for pictures at the top to choose how sharp your pictures should stay - HD, Print, Web or E-mail, the same choices as in PowerPoint's own Compress Pictures. The estimated savings update right away.
At the bottom, Good habits for lean decks collects general tips that keep presentations small. The ones that are relevant to your presentation are marked Applies to this deck.
Compressing Pictures
Pictures are by far the most common reason for large presentations, and presentaid's Compress Pictures dialog shrinks them for you. Open it with Compress pictures… on a picture recommendation, or with Compress all pictures... at the top of the Recommendations tab.
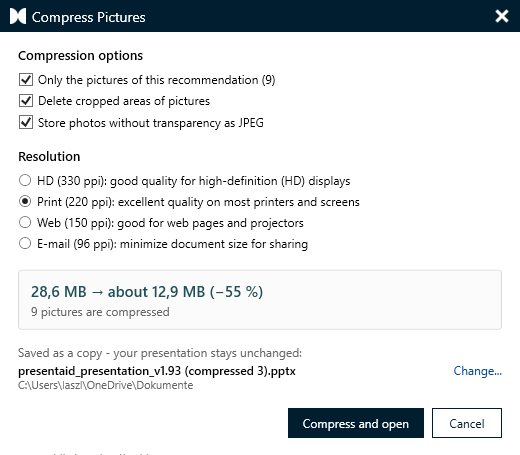
- Choose a Resolution:
- HD (330 ppi) - good quality for high-definition (HD) displays
- Print (220 ppi) - excellent quality on most printers and screens
- Web (150 ppi) - good for web pages and projectors
- E-mail (96 ppi) - minimize document size for sharing
- Choose your options:
- Delete cropped areas of pictures removes the parts you cropped away.
- Store photos without transparency as JPEG turns photos saved as PNG into much smaller JPEGs. Logos, icons and anything with transparency stay as they are.
- If you opened the dialog from a recommendation, you can limit it to Only the pictures of this recommendation.
- Check the estimate - the dialog shows right away how small your presentation will get, for example "28.6 MB → about 11.4 MB (−60%)".
- Check where the copy will be saved. By default it is saved next to your presentation with "(compressed)" added to the name, for example "Q3 Review (compressed).pptx" (or in your Documents folder if the presentation is stored in the cloud). Click Change... to choose a different place.
- Click Compress and open.
presentaid saves the compressed copy, opens it and shows it in the File Size Inspector - including how much smaller it is than the original.
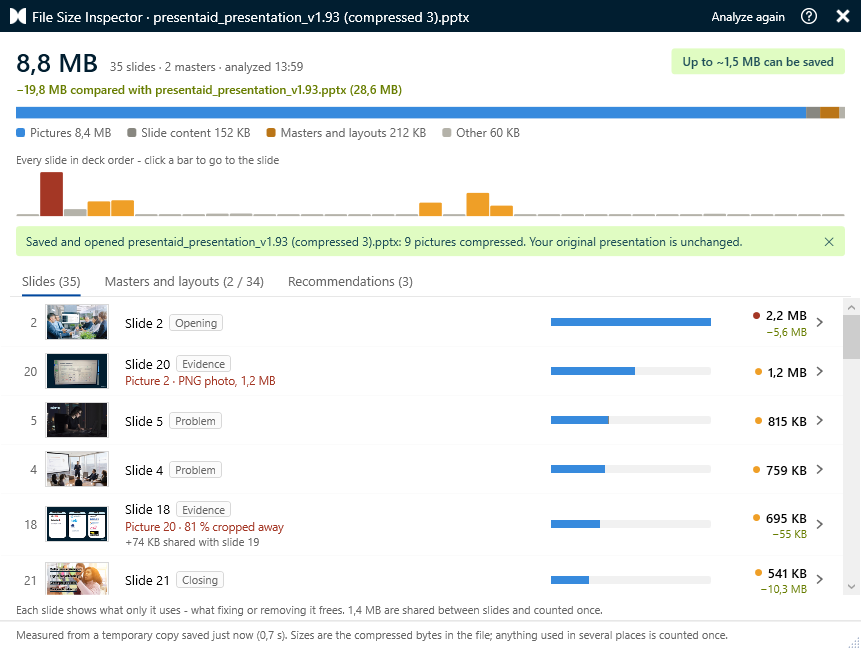
After Making Changes
When the presentation changes - for example after you delete a master - the File Size Inspector shows a blue notice that the numbers may be out of date. Click Analyze again (or press F5) to update them. The new analysis also shows how much smaller the presentation got compared with the previous one.
Good to Know
- Why can the size differ from what Windows Explorer shows? The File Size Inspector measures your presentation as it is right now, including changes you haven't saved yet.
- Encrypted presentations - with a password or a sensitivity label that encrypts them - can't be analyzed, because their content can't be looked into.
- Presentations on SharePoint or OneDrive can be analyzed just like files on your computer.
- Need help while you work? The ? icon in the File Size Inspector's title bar opens this guide.