Introduction #
The presentaid Clever Cluster offers you a One-Click-Experience to align your shapes in a table like format. Additionally, it offers an extended context menu to easily maintain such layouts.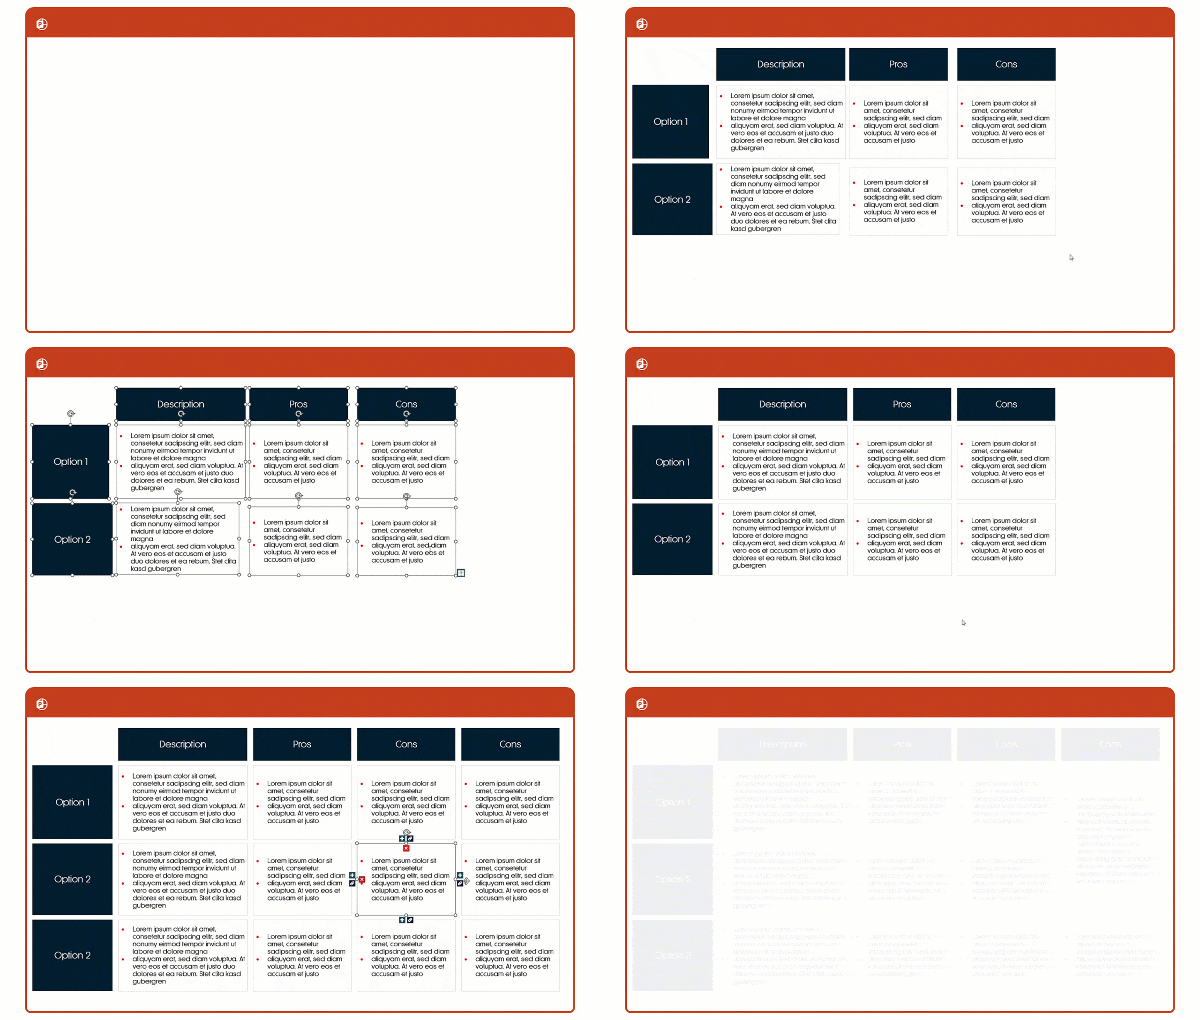
Enable/Disable the Clever Cluster context menu #
To enable or disable the clever cluster context menu, you have to click on the button Show context Menu

Note: The Clever Cluster context menu needs to be enabled to define and adjust the Clever Cluster
Define a Clever Cluster #
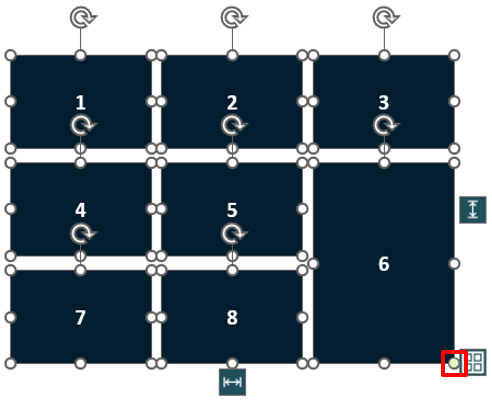
- Select the shapes that you want to arrange and click on the button that will show in the bottom right corner of your selection
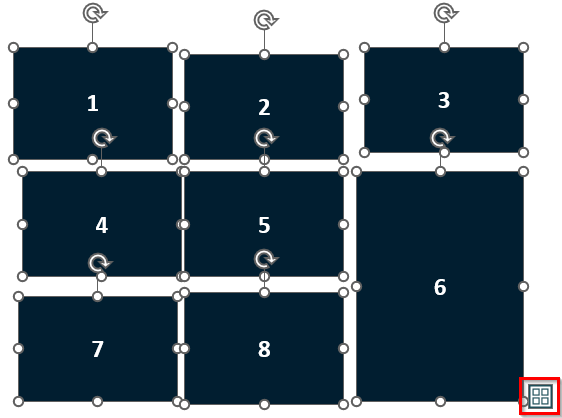
- The shapes are now aligned and your Clever Cluster is defined
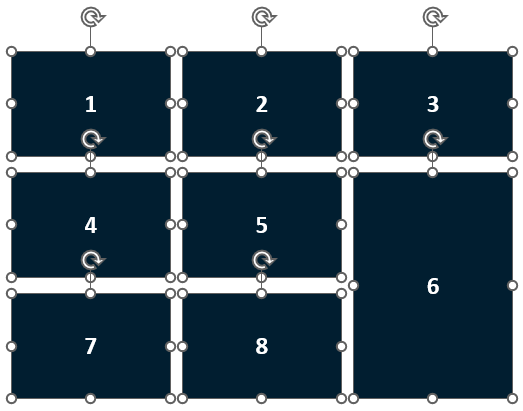
- Adjust the horizontal and vertical space with the arrows in the ribbon until the layout fits your needs

Align Column Width/Row Height #
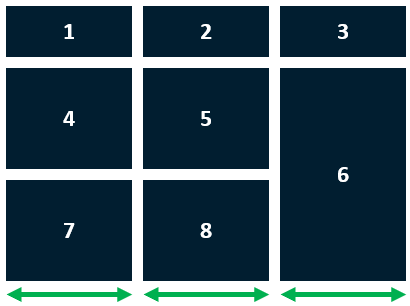
- Select the shapes that you want to arrange and click the button to vertically/horizontally align the shapes
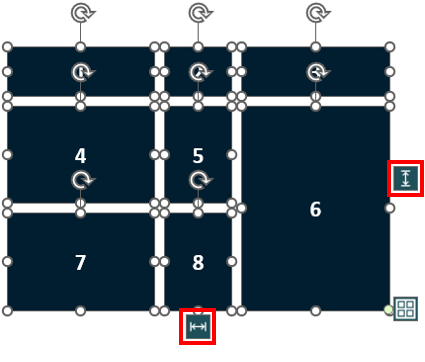
- The width/height of the shapes will be adjusted. The space between the shapes remains unchanged.
Scale the size of your Clever Cluster #
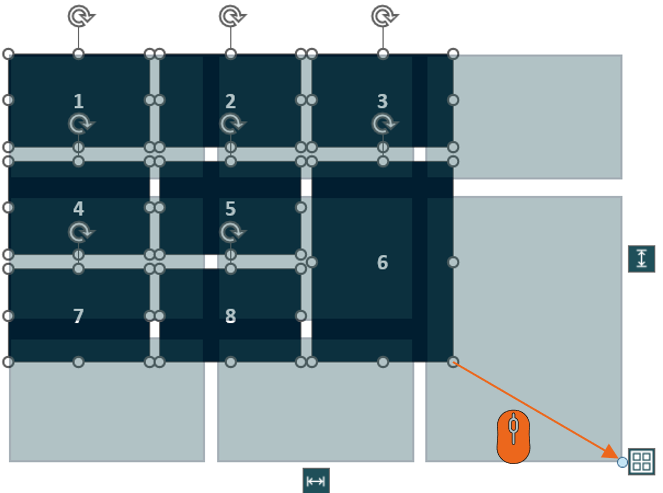
- Select the shapes that you want to arrange and drag the adorner in the bottom right of the Clever Cluster
- You will see a preview of the target state. Release the mouse button to finish the Clever Cluster
Note:
– Press and hold the SHIFT button on your keyboard to lock the vertical/horizontal size of your Clever Cluster
– By default, using the adorner will resize the cells of your Clever Cluster and leaves the horizonal and vertical space as is. If you want to lock in the cell size and want to change the horizontal/vertical space, press and hold CTRL on your keyboard.
Add/Remove/Merge Columns and Rows #
- Select a shape in your Clever CLuster to show the context menu
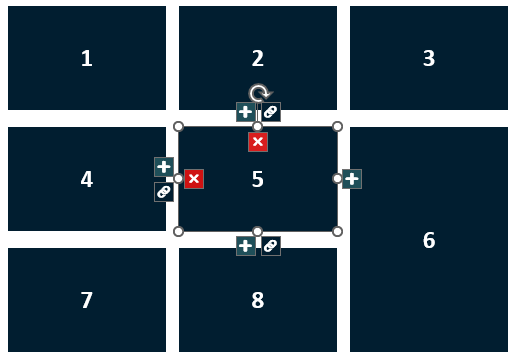
- Amend the Clever Cluster, e.g. add a Column on the right side of your selected shape
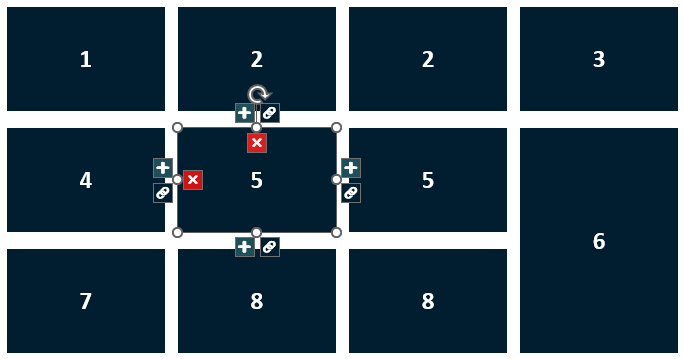
Note: When holding CTRL and clicking a Clever Cluster context menu button, the size of the Clever Cluster (width and height) will be preserved.