With Shared Libraries you can easily access items like Slides Templates, Smart Stickers, Dynamic Grid Templates etc. across your entire company or dedicated (project) teams. We recommend using a SharePoint site as back-end for a Shared Library to make use of all the synchronization features to distribute items.
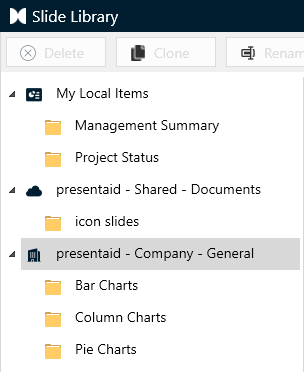
Each Shared Library has the same folder structure as your local presentaid items folders. When saving or applying presentaid items (like SmartStickers, GridLayouts, …) the Shared Library will show up as additional folder in the respective windows.
Set up a Shared Library
To set up a Shared Library you need to execute 3 steps:
- Create a Shared Location - Set up on MS SharePoint (recommended) or via MS Teams
- Mount the Shared Location to your machine (sync with OneDrive)
- Add the Shared Location to presentaid
Create a Shared Location
Shared Location on MS SharePoint
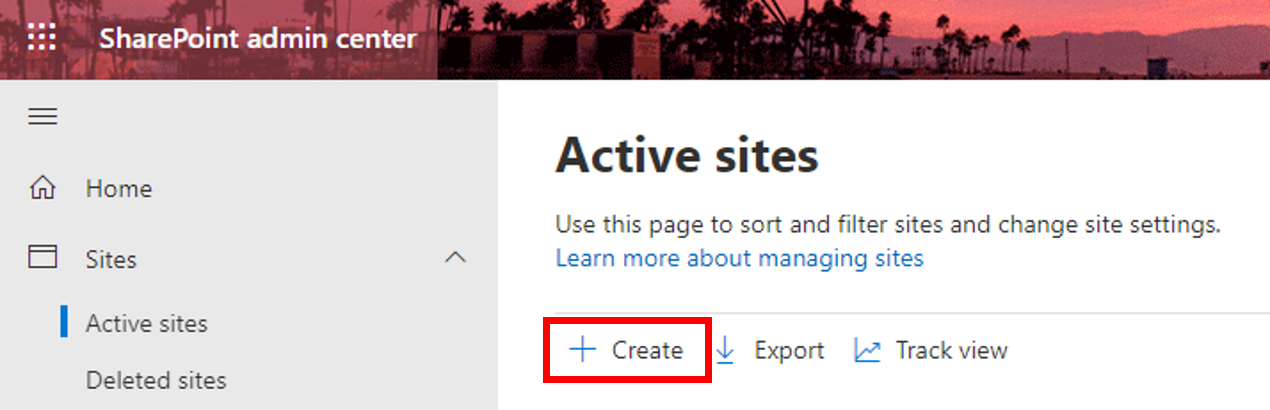
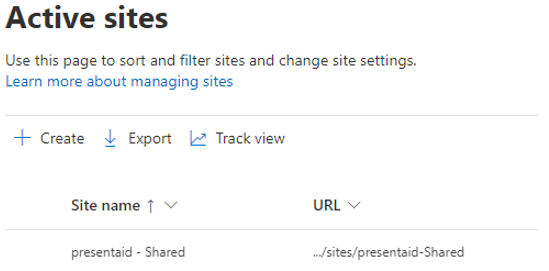
- In the SharePoint Admin Center, select Sites → Active Sites and click on "Create"
Create SharePoint - Select "Team site" and provide a Site name and Group owner — the Group owner will act as Admin of the Shared Location
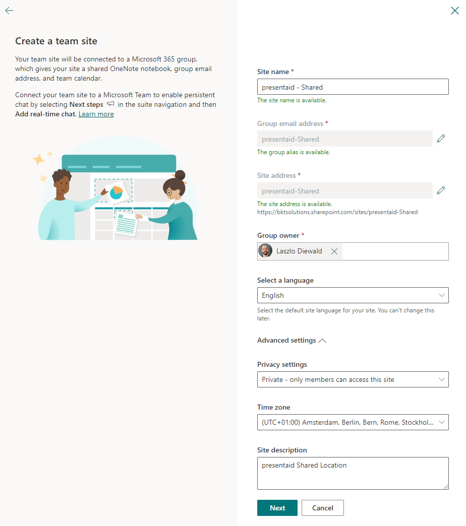
Setup SharePoint - Advanced Settings: If you want to set up an organization wide Shared Location, select "Public". If you want to restrict the access to the Shared Location to certain users, select "Private". In case you have created a "Private" SharePoint, you can add members in the next step
- Add members and finish the site creation. The SharePoint is now ready to be used
New SharePoint Site
Shared Location via MS Teams
Please note that creating a Team in MS Teams also creates a SharePoint for file management purposes. We therefore recommend to use a SharePoint without a Team to avoid unnecessary admin effort.
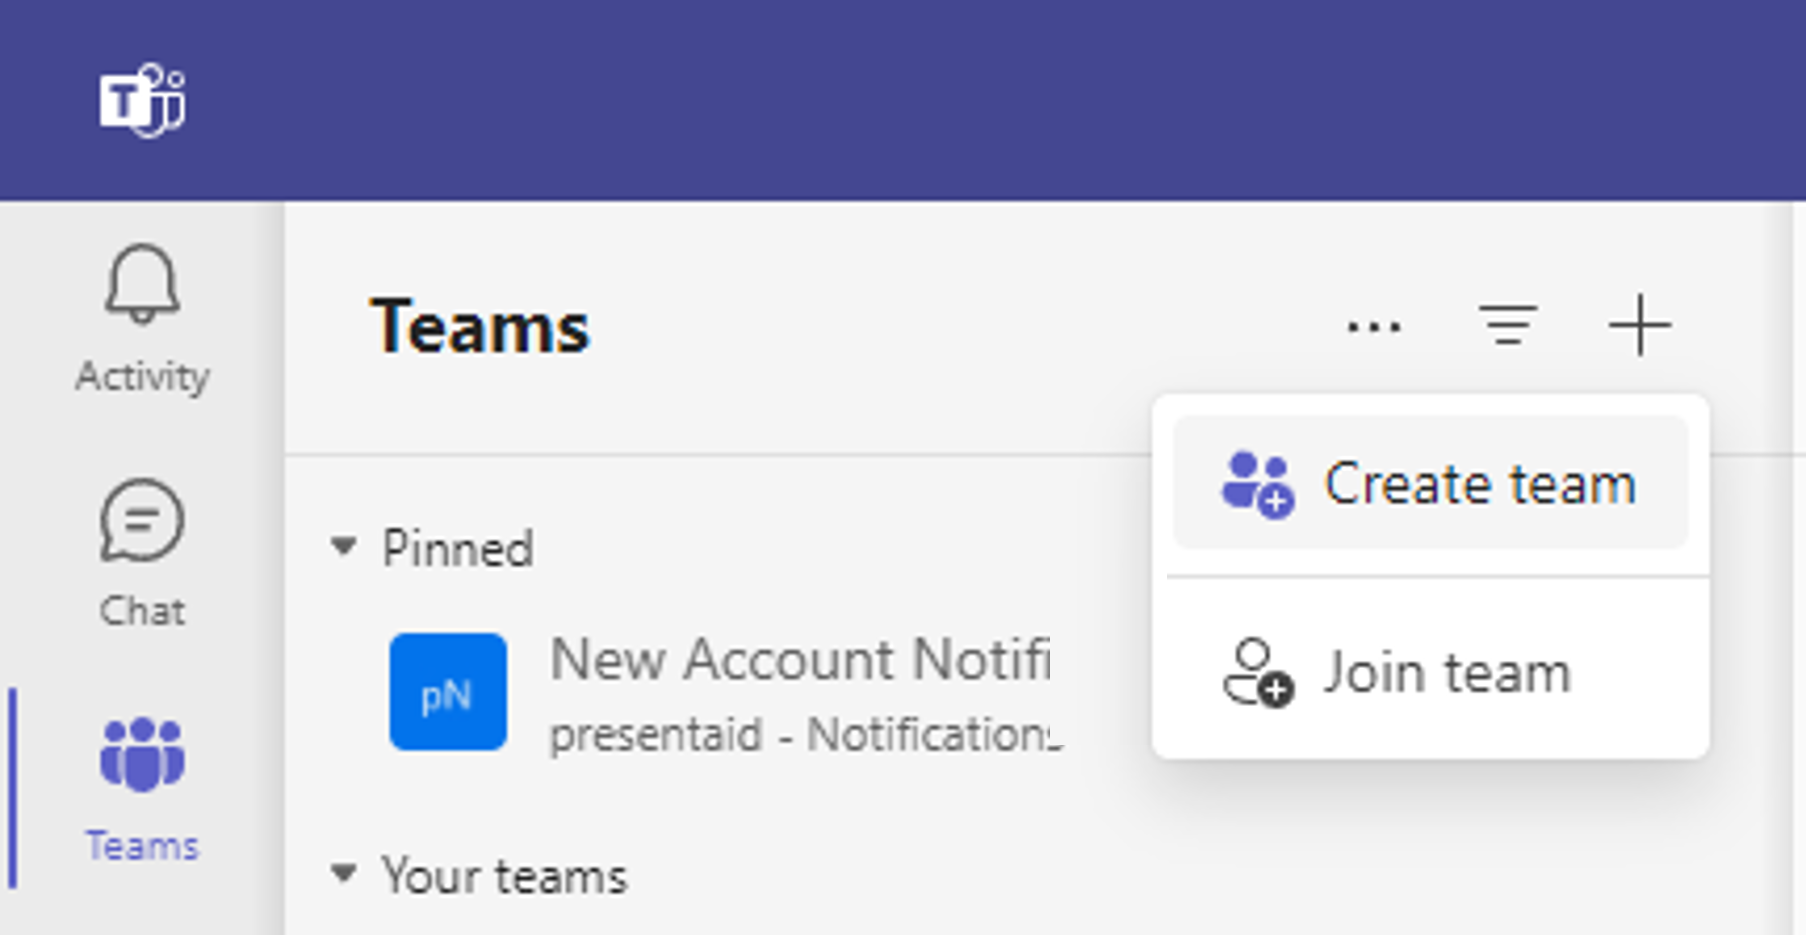
- In MS Teams, click on Teams and add a new Team
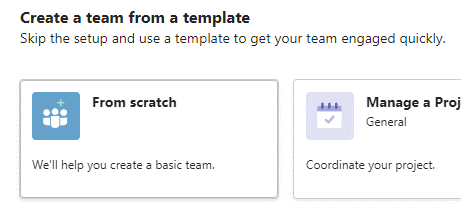
Create New Team - Create a team "From scratch"
Team From Scratch - Select who will have access to the Team:
- Private: Members need to be added explicitly
- Public: Anyone in the organization can join
- Org-wide: All members of the organization are added as member automatically
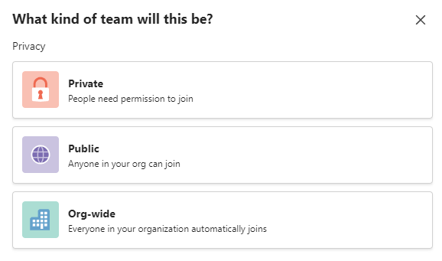
Teams Access
Given that this Team will be used to share files and not to communicate we recommend to disable all Member permissions in the Team settings.

Mount the Shared Location to your machine
Mounting via SharePoint
- Open the SharePoint location in your browser
- Navigate to the "Documents" tab of the SharePoint site, click "Sync" and confirm that you want to sync with OneDrive
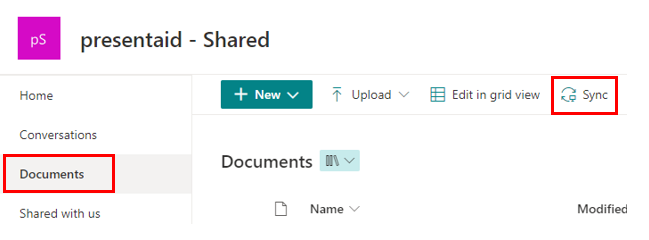
SharePoint Sync - The SharePoint location is accessible via the Windows Explorer now
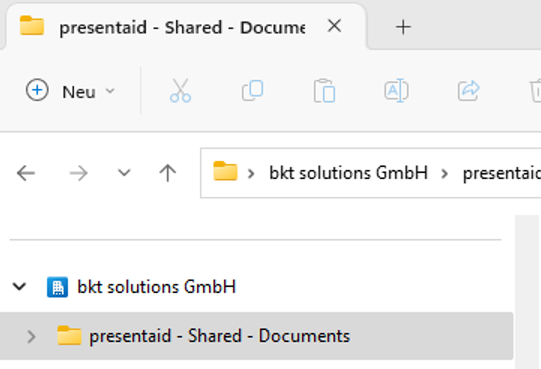
Shared Location Explorer
Mounting via Teams
- Open the "General" tab of the Team
Teams General Tab - Click on "Files" and click on "Sync"

Teams Sync - The SharePoint location is accessible via the Windows Explorer now
Shared Location Explorer
Automated mounting via IT (Expert)
In case you want your entire organization to mount the Shared Location (e.g. for a company library) we recommend using the Microsoft Endpoint Configuration Manager. Details on this procedure can be found on the official Microsoft Documentation page.
Add Shared Location to presentaid
Add Shared Location in PPT/XLS
- In PPT/XLS, select the presentaid tab in the ribbon and click on "About"

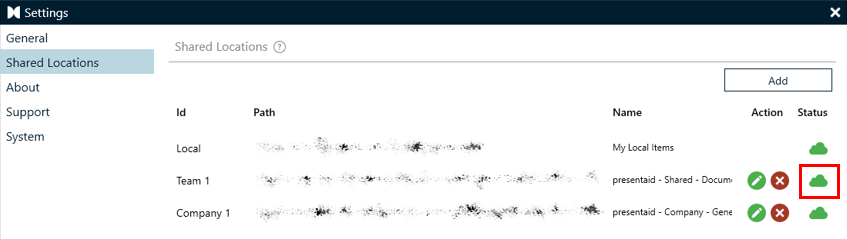
presentaid Ribbon About - Select the "Shared Location" tab, click on "Add" and provide the respective SharePoint location that you would like to add. Alternatively, you can provide your local path of the mounted location (e.g. "C:\Users\[user]\[OneDrive account]\[SharePoint Name]")

Shared Location Add
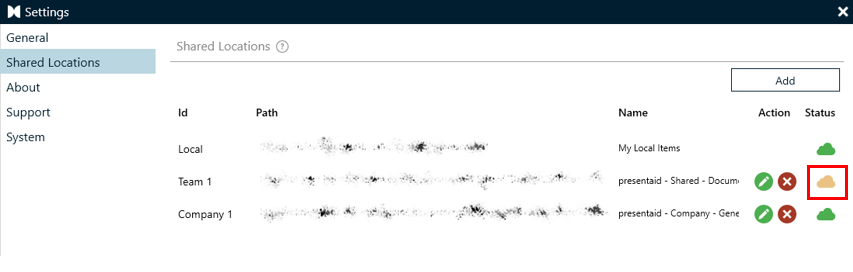
- All good, the Shared Location is connected and in sync

- The Shared Location is connected, but there are non-indexed items in the location. Press the cloud to start the indexing (write access to the location required)

- Can't connect to the Shared Location. Please make sure that the Shared Location is mounted correctly.

Add Shared Location via Registry Entry (Expert)
You can add a key to your registry which will be picked up on the next presentaid start and automatically add the Shared Location. This is in particular relevant if you want to connect your entire organization to a Shared Location with an IT managed roll out.
Managing a Shared Library
Access Rights
Access rights to a Shared Library are managed via the standard SharePoint access rights options. By default there are 2 available permission settings:
- Admin
- Member
By default, SharePoint will create those 2 user groups and grant "Edit" access to members. If you want to restrict the access for Members to "read-only" (e.g. if you are managing an organization-wide Shared Library) you can change the access rights as follows:
- Open the SharePoint website as Admin
- On the top right, select the settings symbol and click on "Site permissions"
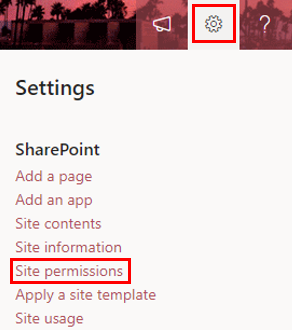
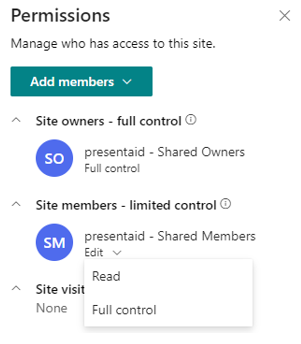
SharePoint Site Permissions - Open the "Site members" tab and change the access rights to "Read"
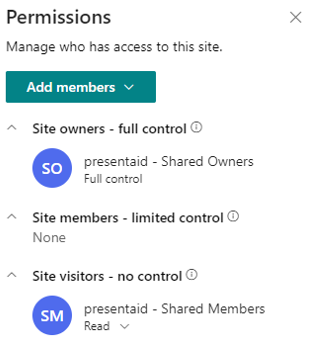
SharePoint Change Permissions - The members are listed as "Site visitors" with read-only access now
SharePoint Read Only
Read-only members have access to all items in the Shared Library but cannot make any changes (add, delete, rename, …) to the items.
Bulk load of slides/documents into the Slide/Document Library
If you already have a folder structure of frequently used slides and documents and you would like to add them to the presentaid Library, you can use the in-built migration functionality.
- Add the slides (.pptx files) to the Slide Library location, respectively add the documents (.docx files) to the Word Library location
- Open PowerPoint/Word and navigate to presentaid → About
presentaid Ribbon About - Click on the yellow cloud to start the indexing process. Please note that PowerPoint/Word needs to be open while the indexing is running
Library Start Syncing - Once the indexing process is done the cloud will turn green.
Library Done Syncing
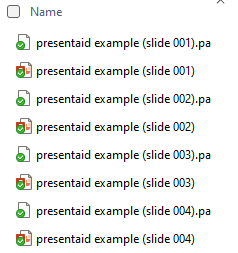
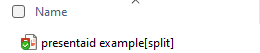
Expert tip: You can also split a presentation into single slides as part of the bulk load process. To trigger this behaviour, simply add "[split]" to the file name, e.g. "presentaid example[split].pptx".
Sample Input file:
Sample Output: New Folder with single slide items